Installing Mozilla SeaMonkey Mail (on Windows)
Run the installer you downloaded in Meet SeaMonkey Mail.
 Although this tutorial focuses on installing SeaMonkey Mail on Windows, the procedure is simple and very similar to be useful for Mac, Linux, and other supported platforms.
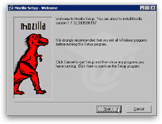
Choose a location for your download, and launch the installer once the download completed. Click Next. You will have to accept the Mozilla Public License, and then choose the type of install you wish. We will choose Custom to see what options are available.
Installation Options
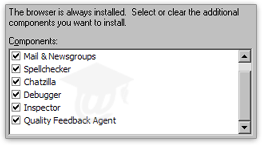
 We will choose to leave all options checked. (If you are running out of space, you can uncheck Spellchecker, Chatzilla, Debugger and Inspector.)
Mail & Newsgroups includes SeaMonkey Mail. The Quality Feedback Agent allows the Mozilla Suite to send information to its developers in case one of its program crashes. This is a useful option, and allows Mozilla's developers to improve their creation.
Click Next, choose a start menu folder, and click Next again.
 The Mozilla Installer then gives you the "Quick Launch" option. By running parts of the program in the background, the Mozilla Suite components will start faster. If you intend to use SeaMonkey Mail often, it might be a good idea to opt-in, provided you have enough memory.
If you are running Windows XP, 512Mb of memory would qualify as "enough." More generally if your computer is less than 1 year old, you probably have enough memory.
Note that the Mozilla Suite's "QuickLaunch" is in no way related to the Windows Taskbar's "Quick Launch" features, which is just a special folder, (available in Windows 2000, ME, XP, and 2003).
Finalizing the Installation
 After confirming your installation choices, the installer will install the Mozilla Suite on your machine. Depending your computer speed, this can take up to a couple minutes.
SeaMonkey Mail, and the Mozilla Suite, are now installed on your computer! The rest of this tutorial will focus exclusively on the SeaMonkey Mail component of the suite.